BombBomb is a video email marketing platform that allows users to create and build relationships through video. By using the application, users can send video to their connections from virtually anywhere. Videos can be sent through email, text, or social media – letting the use reach anyone you need to at any time.
On Botsplash portal, we are enabling BombBomb for two cases
- Botsplash Agent can record videos using their personal webcam
- Select from range of a pre-recorded BombBomb video listing
and send the video to customers via our chat platform as a Text Message, Response to an active Web Chat or in response to FB Conversation. This blog covers the technical details on API integration and any workarounds encountered. Let’s begin!
Prerequisites
You’ll first need to create BombBomb account and get the BombBomb API Key. You can create your account here. You can find your API Key under Integrations page.

Getting Started
BombBomb API Endpoints allow to upload(create new) from or get recorded videos into our application. BombBomb operates on either OAuth API as well as a legacy API. In addition, BombBomb API has jQuery plugins, which makes it super easy to interact with the APIs. At Botsplash, we have gone with the BBCore plugin for its simplicity and the minimal effort to get it started.
Workflow
- Instantiate (and authenticate) BBCore object
- Render the video recorder
- Upload the recorded video to BombBomb and get the video url
- Get list of uploaded videos
Setup an empty project with index.html as our landing page and index.js which will contain our Javascript code. Now, add some boilerplate html to our index.html.
<!DOCTYPE html>
<html>
<head>
  <meta charset="utf-8" />
  <title>BombBomb Video Platform Integration</title>
  <meta name="viewport" content="width=device-width, initial-scale=1">
</head>
<body>
  <div id="videoRecorder"></div>
</body>
</html>
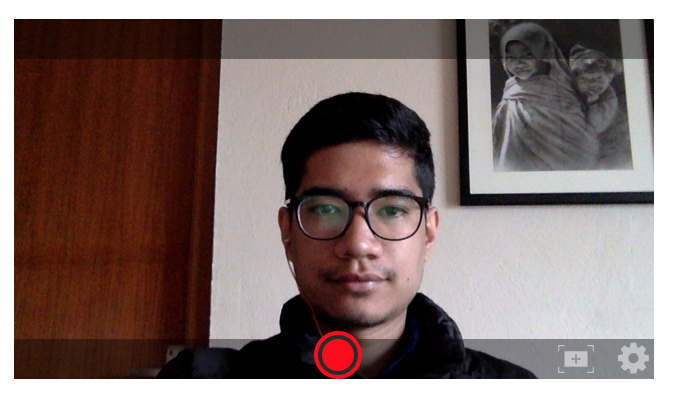
We created a div with the id of “videoRecorder” which will be used to render the video recorder. Now let’s include BBCore plugin scripts in our html file before closing of the body tag.
...


<script src="https://code.jquery.com/jquery-3.3.1.js"></script>


<script src="https://s3.amazonaws.com/static.bombbomb.com/js/BBCore.min.js"></script>


<script src="index.js"></script>


...
The BBCore object is instantiated via a custom script file. Create index.js file and load the video recorder. Include the script file in the html file, shown in image above .
//index.js


const bb = new BBCore({ accessToken: '<your api token>'});
bb.startVideoRecorder({ target: '#videoRecorder'}, (vidInfo) => {
});
Replace ‘
To start recording and to save the video, we’ll need to call another function “saveRecordedVideo” inside the callback function of “startVideoRecorder”. This new function takes in name of the video, video Id, filename and a callback function as parameters. Video Id and filename is available to us from “vidInfo” object that is returned from “startVideoRecorder”.
//index.js


...


bb.startVideoRecorder({ target: '#videoRecorder'}, (vidInfo) => {
  bb.saveRecordedVideo(
    'Our video!',
    vidInfo.videoId,
    vidInfo.filename,
    (data) => {
      alert('Your video has been saved!');
    }
  );
});
Now once we finish recording our video, it should alert a message saying “Your video has been saved”. There you go, it’s as simple as that. The uploaded video url can be found inside the data object returned from the function.
//index.js


...


bb.startVideoRecorder({ target: '#videoRecorder'}, (vidInfo) => {
  bb.saveRecordedVideo(
    'Our video!',
    vidInfo.videoId,
    vidInfo.filename,
    (data) => {
      console.log('Url: ', data.info.video_urls.H264Main);
    }
  );
});
We can give the user an option to choose the name of the video to save. We’ll add an input text just above the video recorder. Once the video is recorded, we’ll fetch the video name from the text input and pass it as the first parameter in our “saveRecordedVideo” function. Here is how our final code up to this point looks. I have added some heading and paragraph tags to give proper spacing.
Access and Display pre-recorded videos
Up to this point, our application can record our video and save it and return the url of the video. But we also want to display the list of existing videos in the webpage. We need to make use of “getVideos” function for it. Let’s go ahead and query our videos.
// index.js


...


bb.getVideos((response) => {
  console.log(response.info)
});
If we check the logs, we should see list of the videos like below:

Let’s loop over the videos and append it as image link to our html page. We need to add a div that will hold the video list for us which is what “videoList” div does.
// index.html


...


<p>
  <input type="text" id="videoName" value="Sample video name" />
</p>
<h2>Video Recorder</h2>
<div id="videoRecorder"></div><hr />
<h2>Recorded videos</h2>
<div id="videoList"></div>


...


//index.js


...


bb.getVideos((response) => {
  _for_ (let index = 0; index  < response.info.length; index++) {
    const vid = response.info[index];
    $('#videoList').append(`
      <span>
        <a href="${vid.shortUrl}" target="_new">
         <img src="${vid.animatedThumbUrl}" height="200" />
        </a>
      </span>
    `);
  }
});
The video url is available in “shortUrl” property and animated thumbnail is available in “animatedThumbUrl” property inside response.info. At this point, you should be able to see something like this.
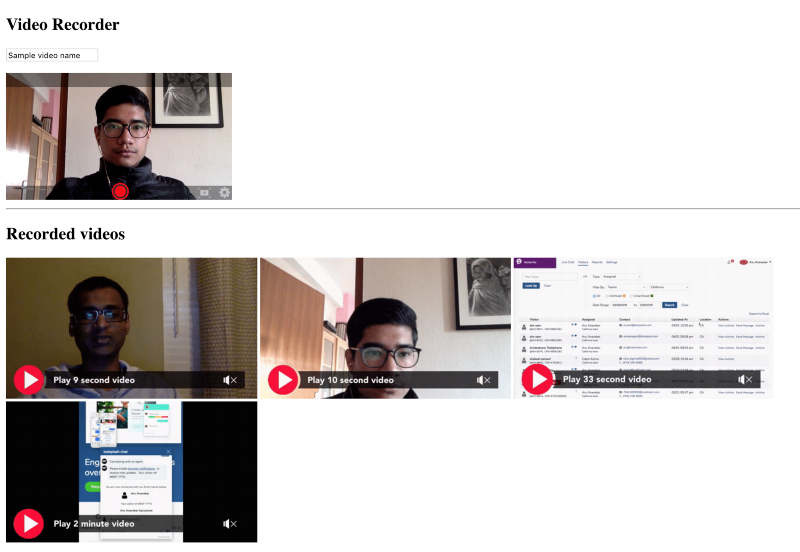
We also want to prepend newly recorded video to the list as soon as recording is complete. Let’s add code to achieve that as well.
//index.js


...


bb.startVideoRecorder({ target: '#videoRecorder'}, (vidInfo) => {
  bb.saveRecordedVideo(
    videoName,
    vidInfo.videoId,
    vidInfo.filename,
    (data) => {

      // video has been saved
      console.log('Url: ', data.info.video_urls.H264Main);
      $('#videoList').prepend(`
        <span>
          <a href="${data.info.short_url}" target="_new">
            <img
              src="${data.info.animated_thumb_url}"
              height="200"
            />
          </a>
        </span>
      `);
    }
  );
});


...
From here on, you can make additional changes like CSS layouts or displaying video name and timestamp below each video and much more to suit the need of your application. Here is how our final code looks.
Thanks for following through. I hope you liked the article. Do share your thoughts and opinions in the comments sections. I would love to read them and get back. If you want to read more of Botsplash team contributions, check out articles here.
For more articles on Live Chat, Automated Bots, SMS Messaging and Conversational Voice solutions, explore our blog.
Want to learn more about Botsplash platform? Write to us here.