
We at Botsplash recently migrated our blogging platform from Medium to self hosted Jekyll site with Netlify CMS to manage the content.
Let’s look at how you can migrate your blog from Medium to Jekyll and use Netlify CMS to manage the content. We will be hosting our site using Github pages in this tutorial but you can also use your custom domain which we will be discussing at the end. We shall be covering the following steps in this blog:
- Export contents from Medium as zip
- Create new Jekyll project
- Import Medium articles to Jekyll
- Integrate Netlify CMS (along with Github OAuth)
- Using your custom domain (optional)
1. Export contents from Medium as zip
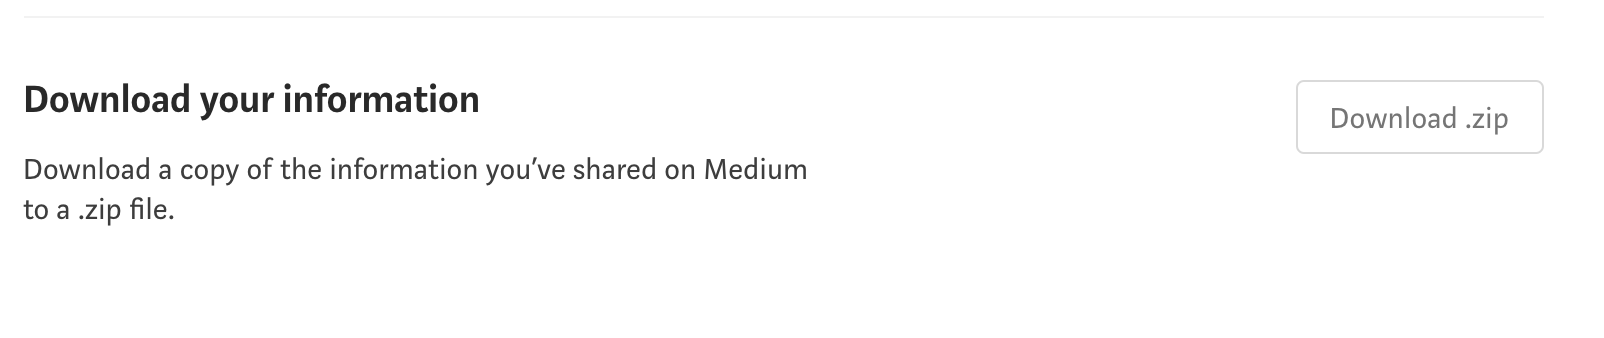
Medium allows you to export all your contents. You need to login to your Medium account and head to the Settings page. If you scroll down, you will see “Download your information” section just above “Membership”. Just click the “Download .zip” button and then in the next screen, click ‘Export’.
Now you should receive all your contents in zip format in your email. Go ahead and download it. If you unzip it, you can see it has all the content with comments, claps, bookmarks, drafts etc. We only need the “posts” folder for now.
2. Create new Jekyll project
Now we have our Medium articles exported, we need to get our website ready where we can import it and display it. For this tutorial, we are going to use an existing Jekyll theme. Go ahead and download the project as zip in your local system.
If you instead clone the project, you will need to remove the .git folder since we will be uploading the project to our own repository later.
> git clone https://github.com/sumeetbajra/beautiful-jekyll
> cd beautiful-jekyll
> rm -rf .git
Jekyll is a simple, static and extendable site generator. It is based on Ruby and hence you’ll need to have full Ruby development environment setup. More information can be found here.
After you have the environment setup, go into the project folder using your terminal and enter bundle install command. You might be prompted to enter your admin password. After the required packages are installed, go ahead and run the Jekyll project using the command bundle exec jekyll serve
> cd beautiful-jekyll
> bundle install
> bundle exec jekyll serve
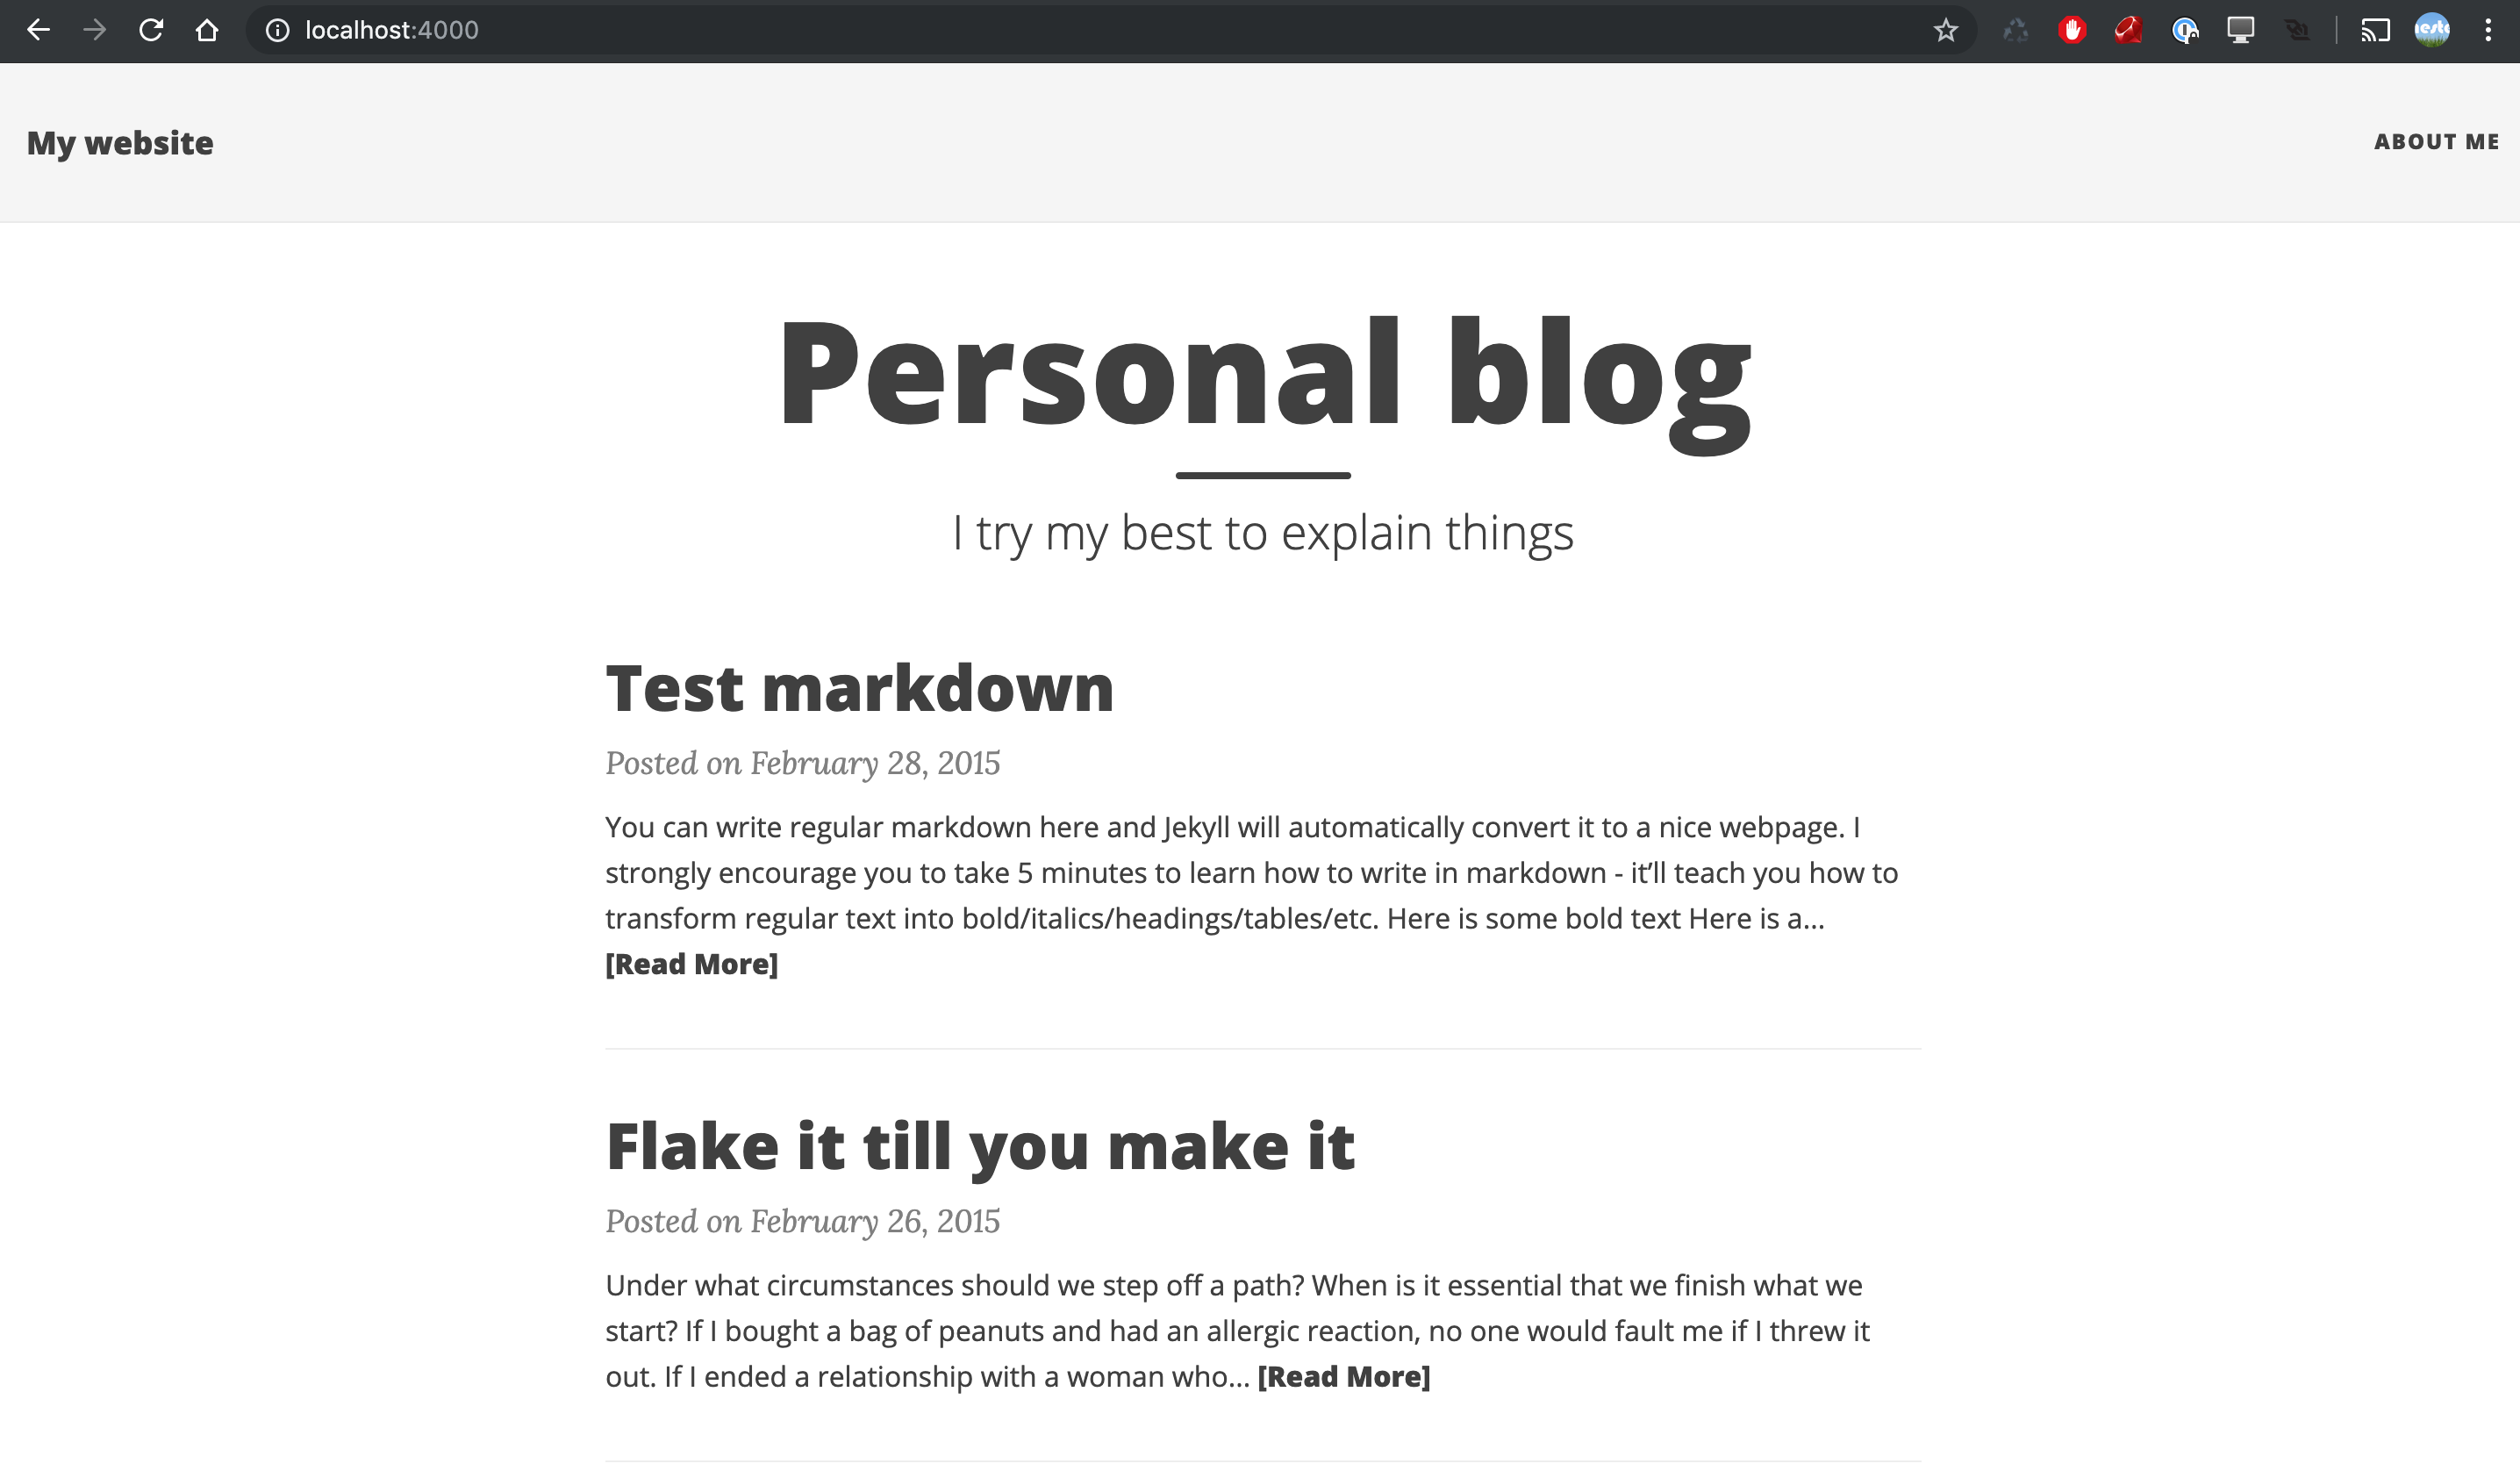
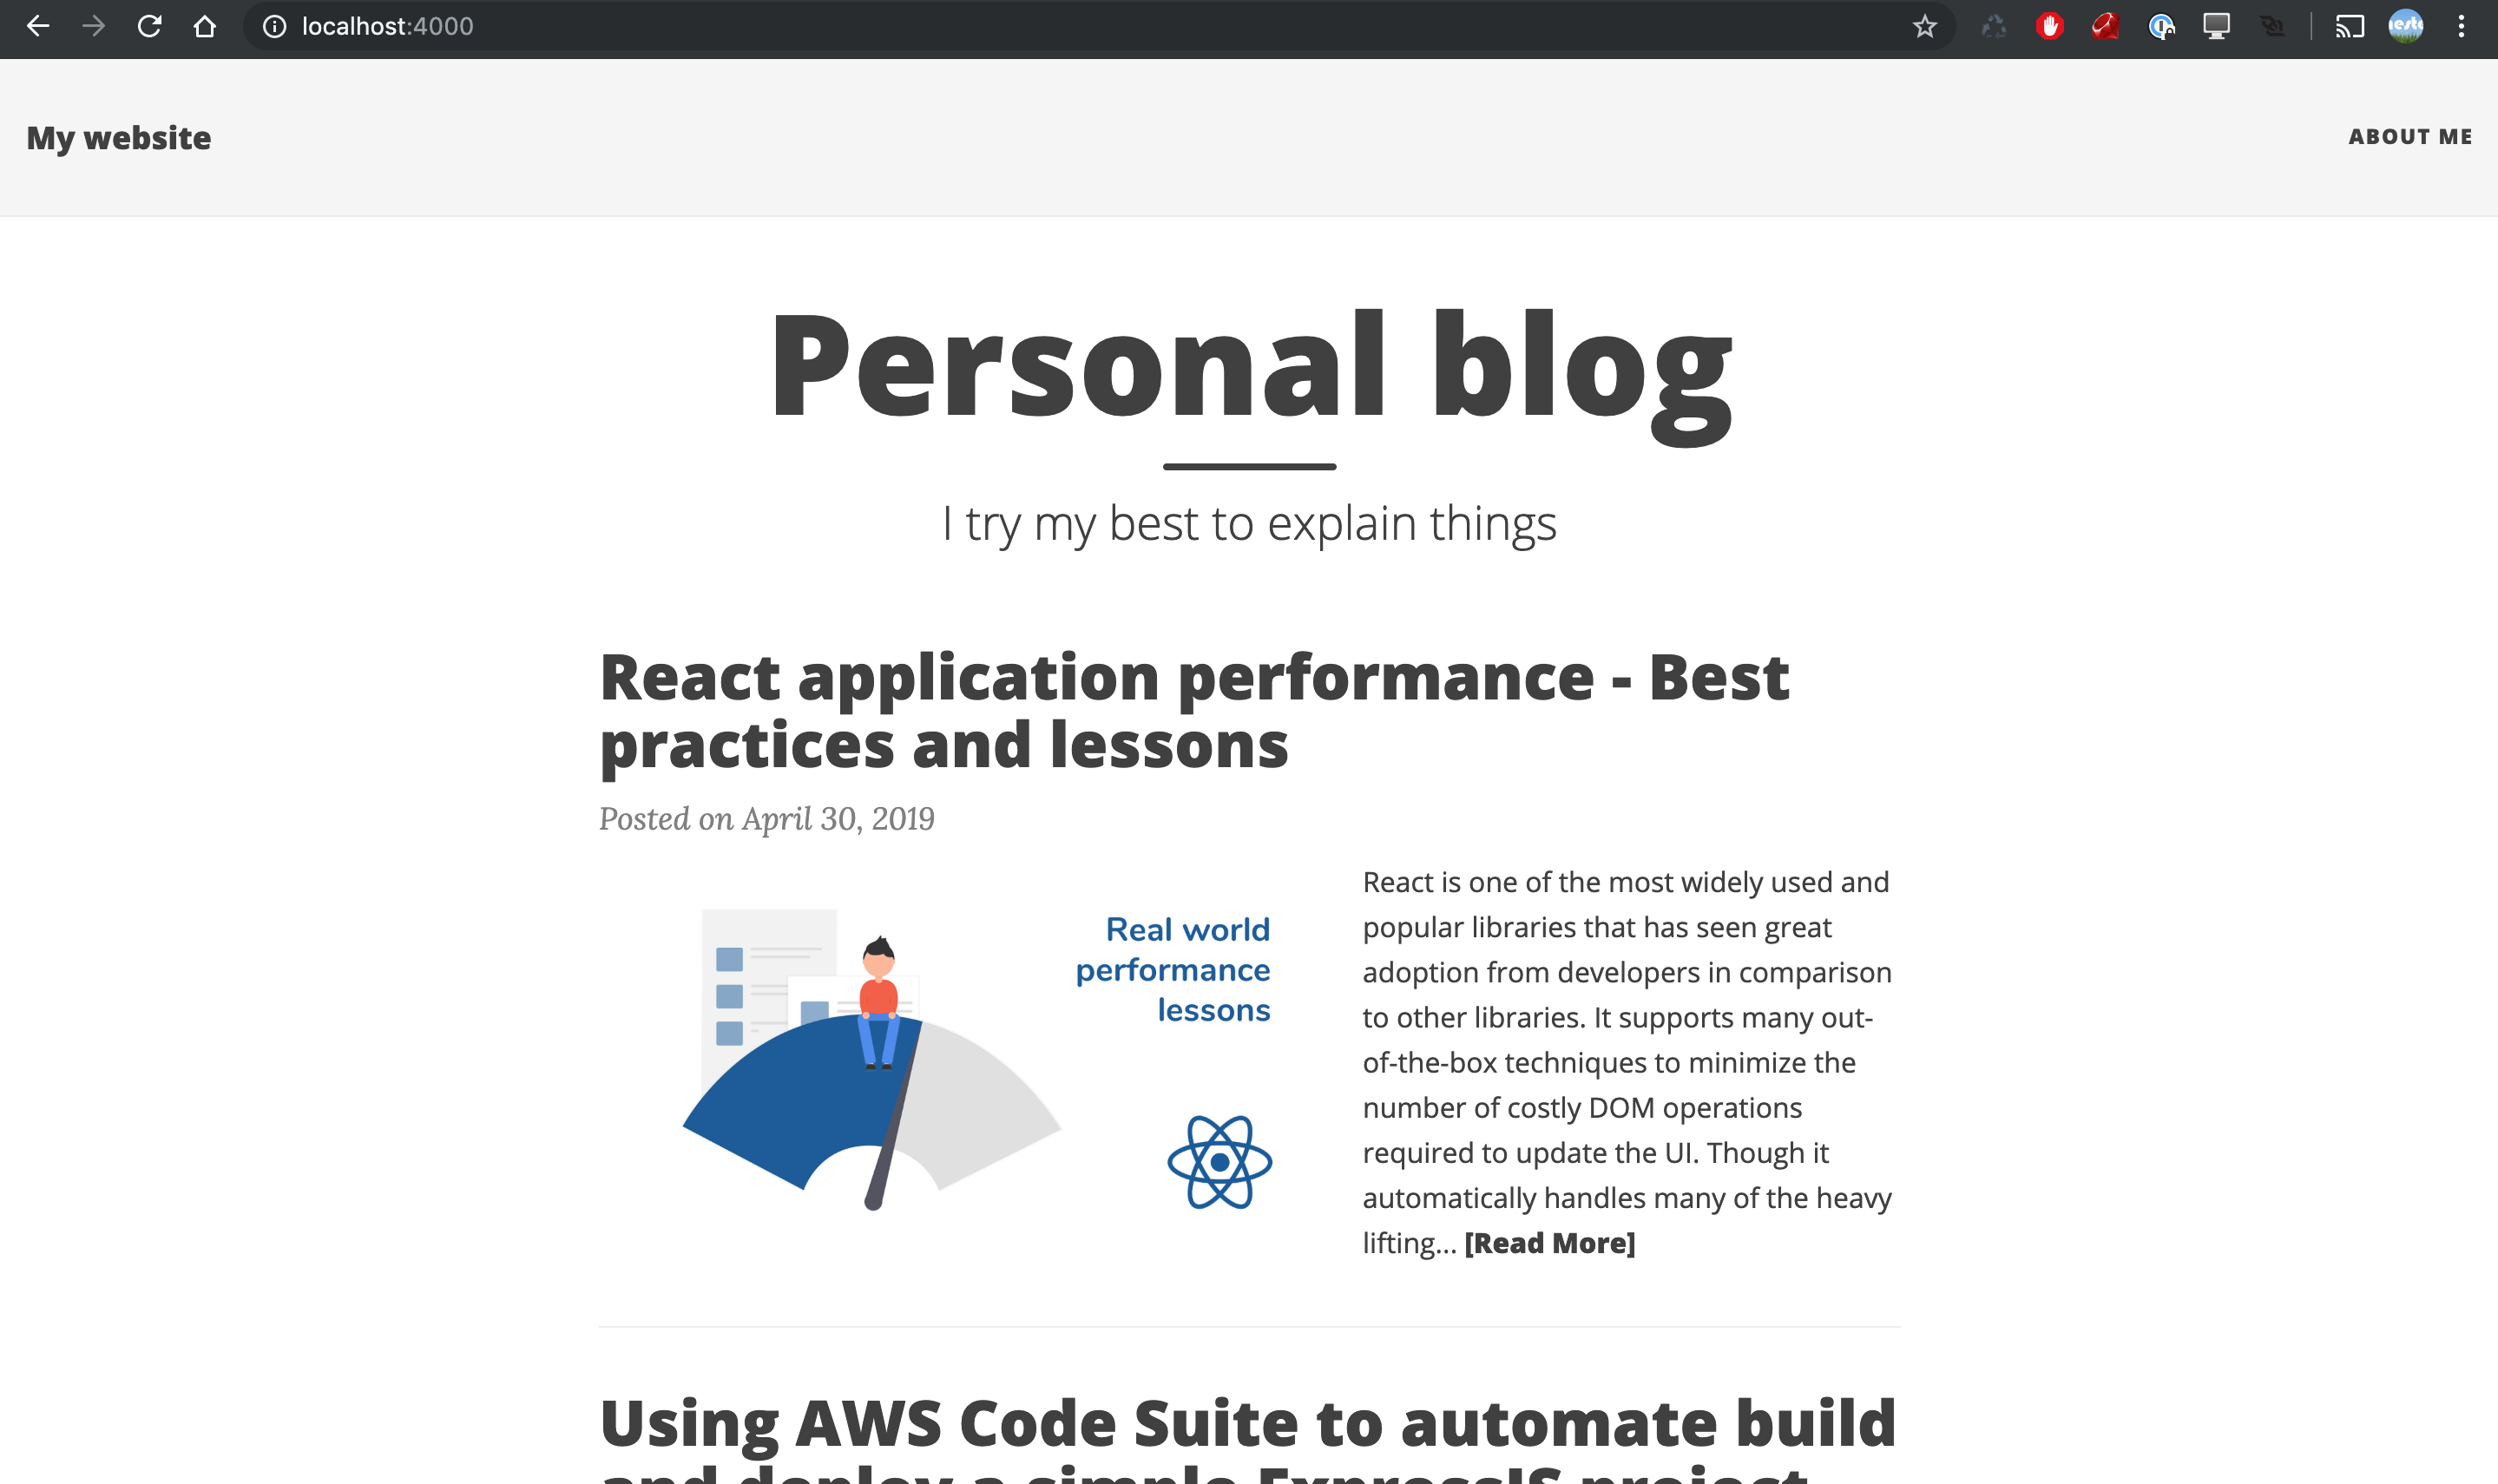
You should see your blog running at http://localhost:4000
Copy the ‘posts’ folder from the ‘medium-export’ folder which we unzipped in the previous step to our Jekyll project folder. Note that ‘posts’ and ‘_posts’ folders are different folders. ‘posts’ is the one containing our Medium exported blogs and ‘_posts’ is the one used by Jekyll internally.
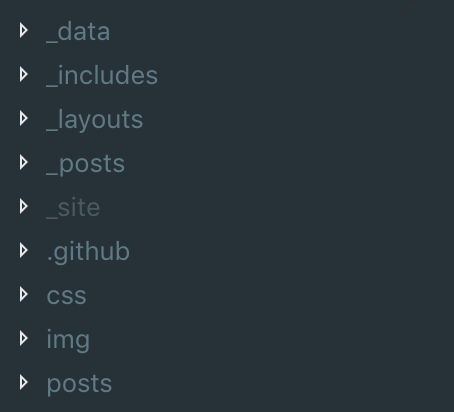
Note: Medium considers comments/responses as posts so the posts folder will contain the comments/responses made in the original Medium article as separate html files. Since we don’t want to display them in our blog as separate entry, we can go ahead and delete them.
3. Import Medium articles to Jekyll
Jekyll reads posts from ‘_posts’ folder which currently contains sample posts. We can go ahead and delete all the files inside ‘_posts’ directory.
Our Jekyll project requires our posts to be in Markdown format but the articles we exported from Medium are in html format. We also need to get the images used in our Medium blogs and save it locally along with Jekyll Front Matter. This process is complicated so we will be using a Python script to automate all the required process using a single line of command.
Go ahead and clone the Python script from here inside our current project folder. You will execute the script using the python command. If you are using MacOS, Ubuntu or Debian, Python might already be installed on your system. If not, you can download Python from here.
> cd beautiful-jekyll
> git clone https://github.com/sumeetbajra/medium-to-jekyll
If you followed our directory structure, you should have ‘posts’ folder containing all the Medium exported articles and ‘medium-to-jekyll’ folder containing our Python script all inside the ‘beautiful-jekyll’ project. Now go inside the ‘medium-to-jekyll’ folder and execute these commands.
// change directory
> cd medium-to-jekyll

// setup environment for the script
> pip install virtualenv
> virtualenv venv
> source venv/bin/activate
> pip install -r requirements.txt

// execute script
> python medium_to_jekyll.py --source ../posts --dest ../ --layout post --category blog

// exit the python virtual environment
> deactivate
Here, –source flag is the directory of the Medium exported ‘posts’ folder and – dest flag is the root directory of our Jekyll project.
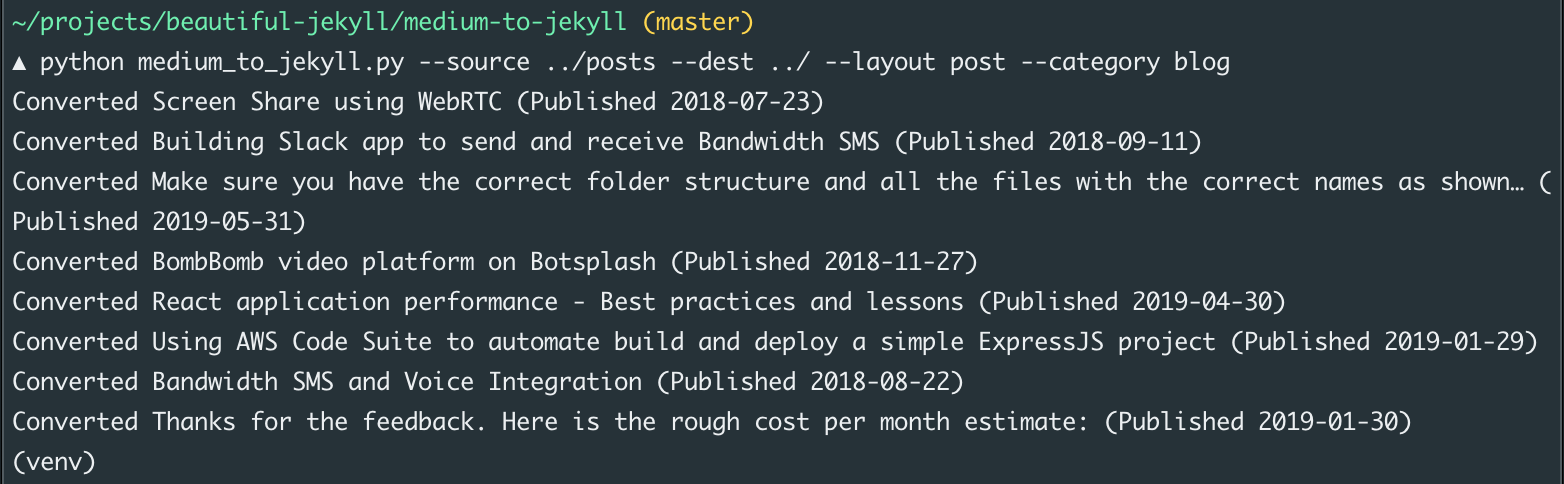
If you refresh the page at http://localhost:4000, you should see all your Medium articles.
Note: If you don’t see the new posts, stop the Jekyll server and restart it again using bundle exec jekyll serve command.
After this, we won’t be needing the ‘posts’ folder containing Medium exported articles and ‘medium-to-jekyll’ folder anymore. We can move them to separate directory outside our Jekyll project or delete them.
// go back to project root directory
> cd ..
> rm -rf posts
> rm -rf medium-to-jekyll
4. Integrate Netlify CMS
This is all great so far. We have our Medium articles exported and displayed in our own project. Next, we need to be able to add, update or delete blog posts from our own project. For that, we will be using Netlify CMS.
Netlify CMS will allow us to manage our articles directly to Github repo. Thus, we will need to create a new repository for our blog. Let’s go ahead and upload our ‘beautiful-jekyll’ to our own Github repository.
Create a new Github repository from here. You can name the repository as <github-username>.github.io. This will allow our site to be hosted via Github Pages.
Note: Before you upload the project to Github, you might want to update the site’s _config.yml file. It currently contains dummy information and you will want to replace it with your information before uploading it. You can make other changes too as you may feel necessary. Find more details on Jekyll config file here.
Let’s initialize git in our folder and upload it to our newly created repository.
> cd beautiful-jekyll
> git init
> git add --all
> git commit -m "Initial commit"
> git remote add origin git@github.com:sumeetbajra/sumeetbajra.github.io.git
> git push -u origin master
After it’s done, give it a couple of minutes for Github pages to deploy your app and you should see the blog up and running at https://<github-username>.github.io if you are using Github pages. In my case, the site is available at https://sumeetbajra.github.io
Creating Github OAuth app
Now we have our Github repository ready, let’s go and integrate Netlify CMS. We will be using Github OAuth for authenticating users to our blog and thus we need to create new Github OAuth app. Head over to Settings page or you can directly click here https://github.com/settings/developers
Click on “New OAuth App” and fill up the form. For ‘Authorization callback URL’, use “https://api.netlify.com/auth/done”

You will then get redirected to the OAuth app’s page which contains ClientID and Secret. You will need this later.
Creating Netlify app
After creating the Github OAuth app, we need to create a Netlify app. Go to https://app.netlify.com and login with your Github account. Once logged in, click on ‘New Site from Git’ and select Github.
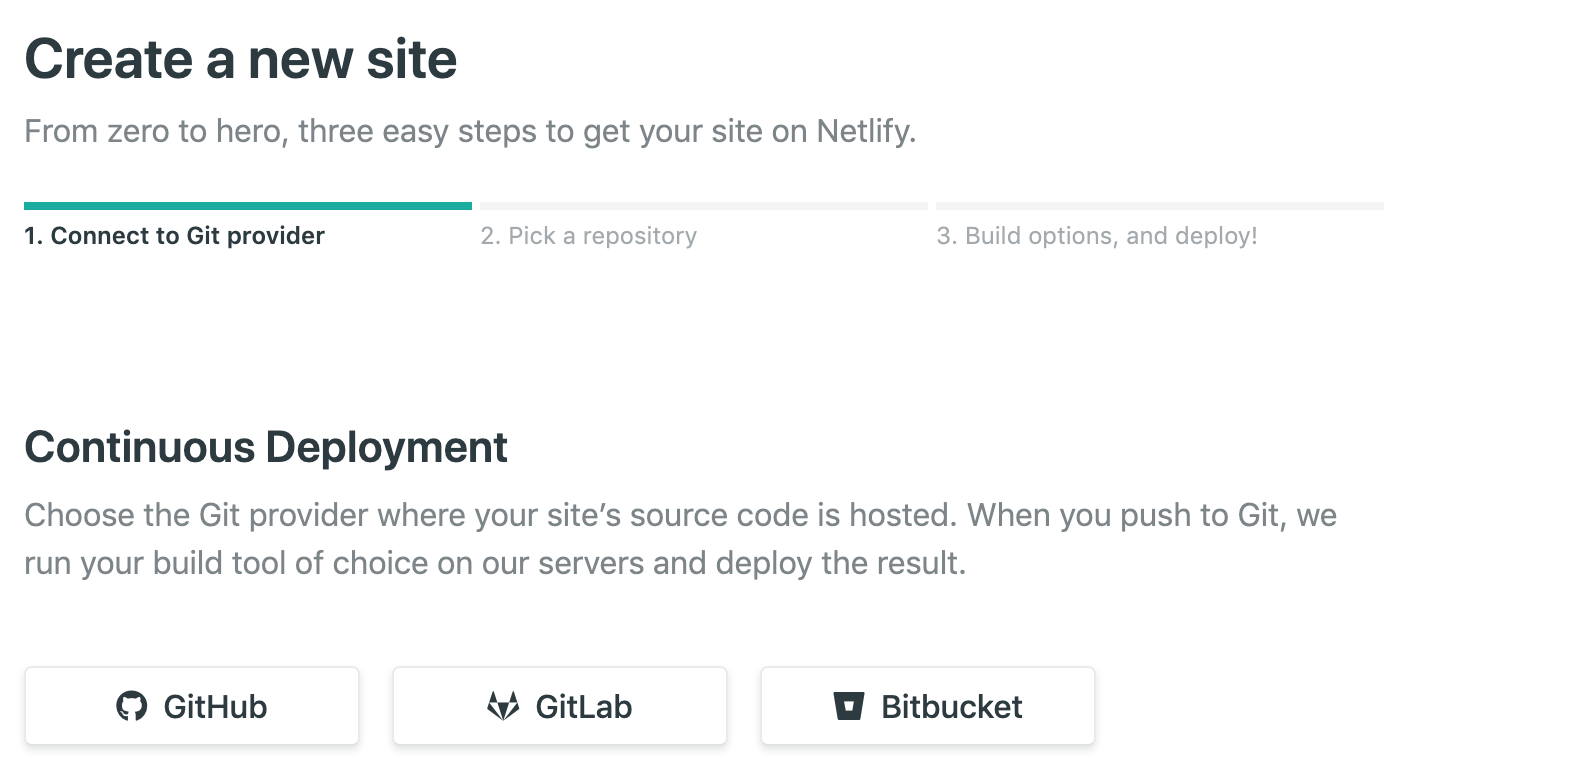
Here, if you wish to host your Jekyll blog using Netlify too, you need to select the newly created blog repository. Otherwise you are free to select any repository you want. Even an empty repository like this will work which I created for this example. In the next step, leave all the settings as it is and click ‘Deploy site’.
If you are not hosting the Jekyll project on Netlify, keep ‘Build command’ and ‘Publish directory’ empty.
Now we need to connect our Netlify app to Github OAuth. Head over to the Settings page -> Access control -> OAuth

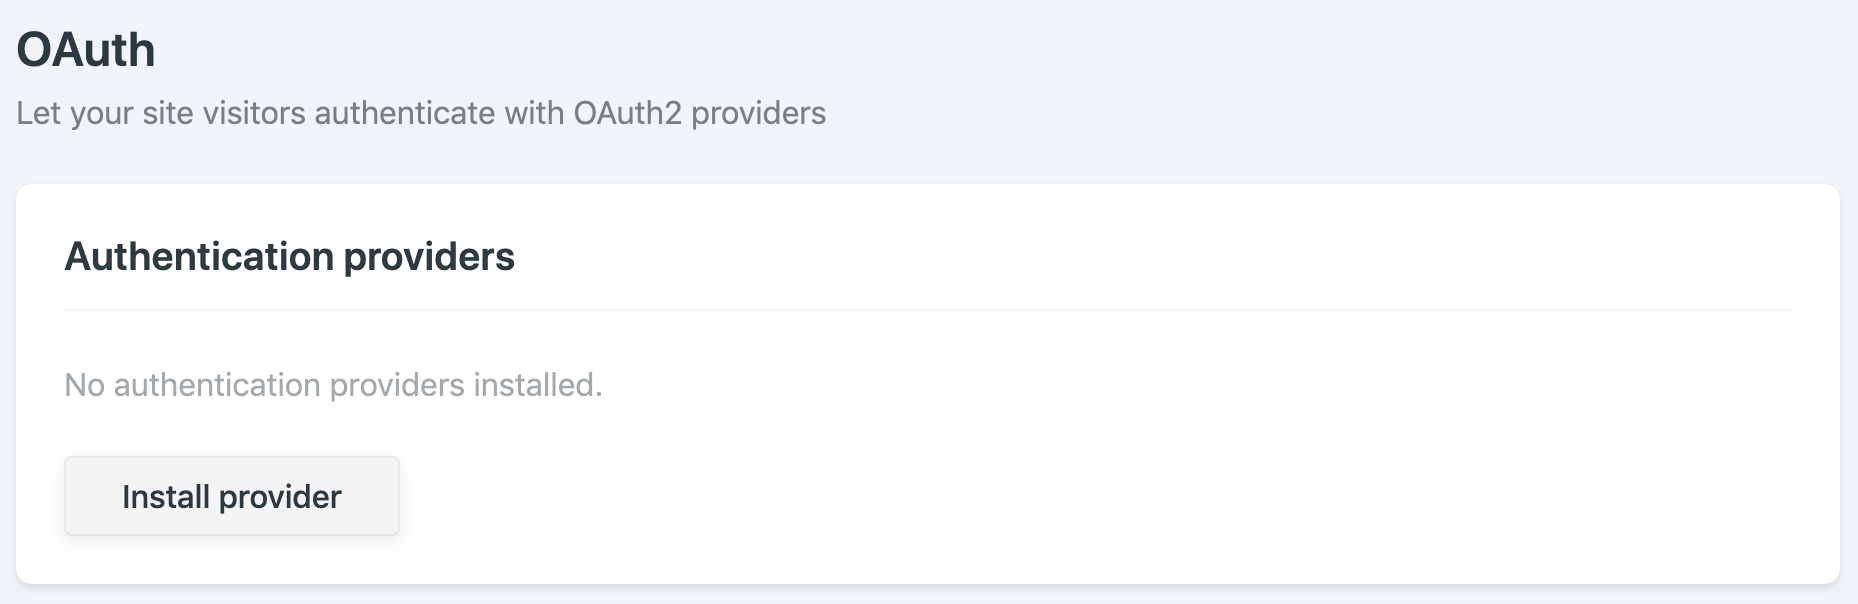
Click on Install provider and select Github as provider. Copy the Client ID and Secret from the Github OAuth app’s page and paste them here.
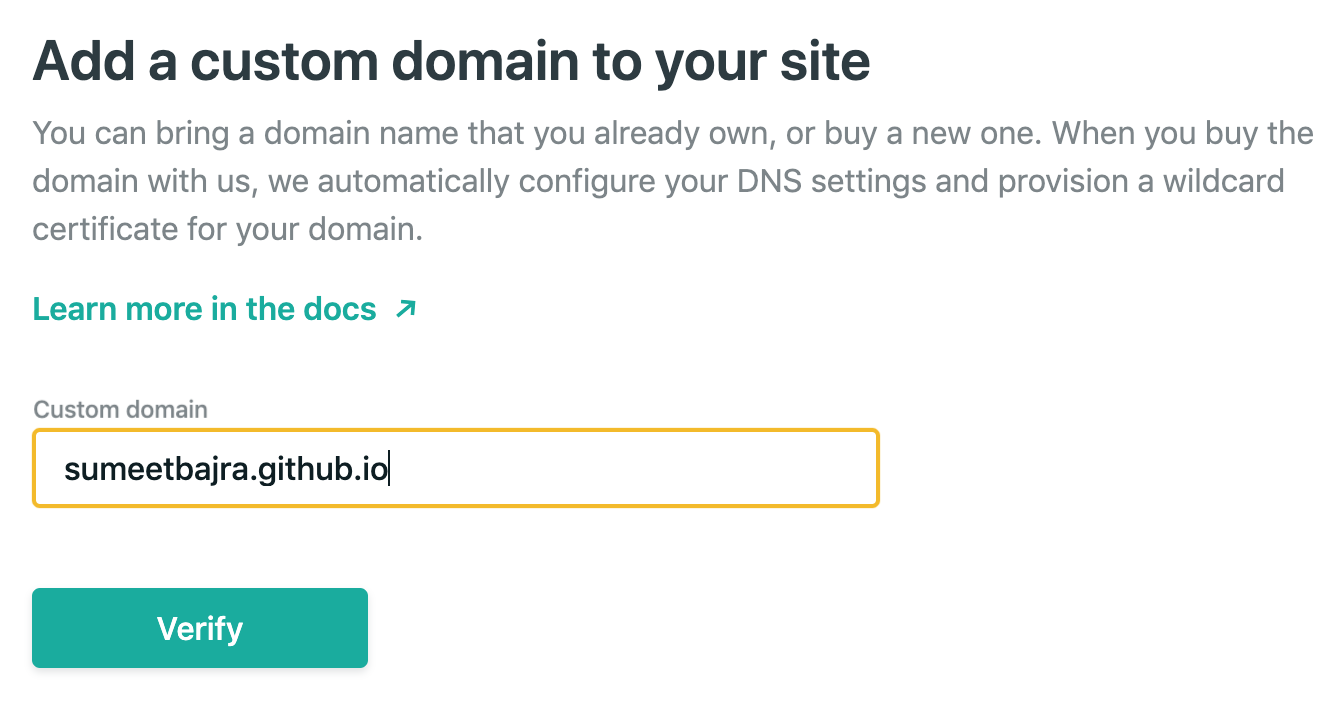
Next, go to Settings -> Domain Management, click on ‘Add custom domain’.
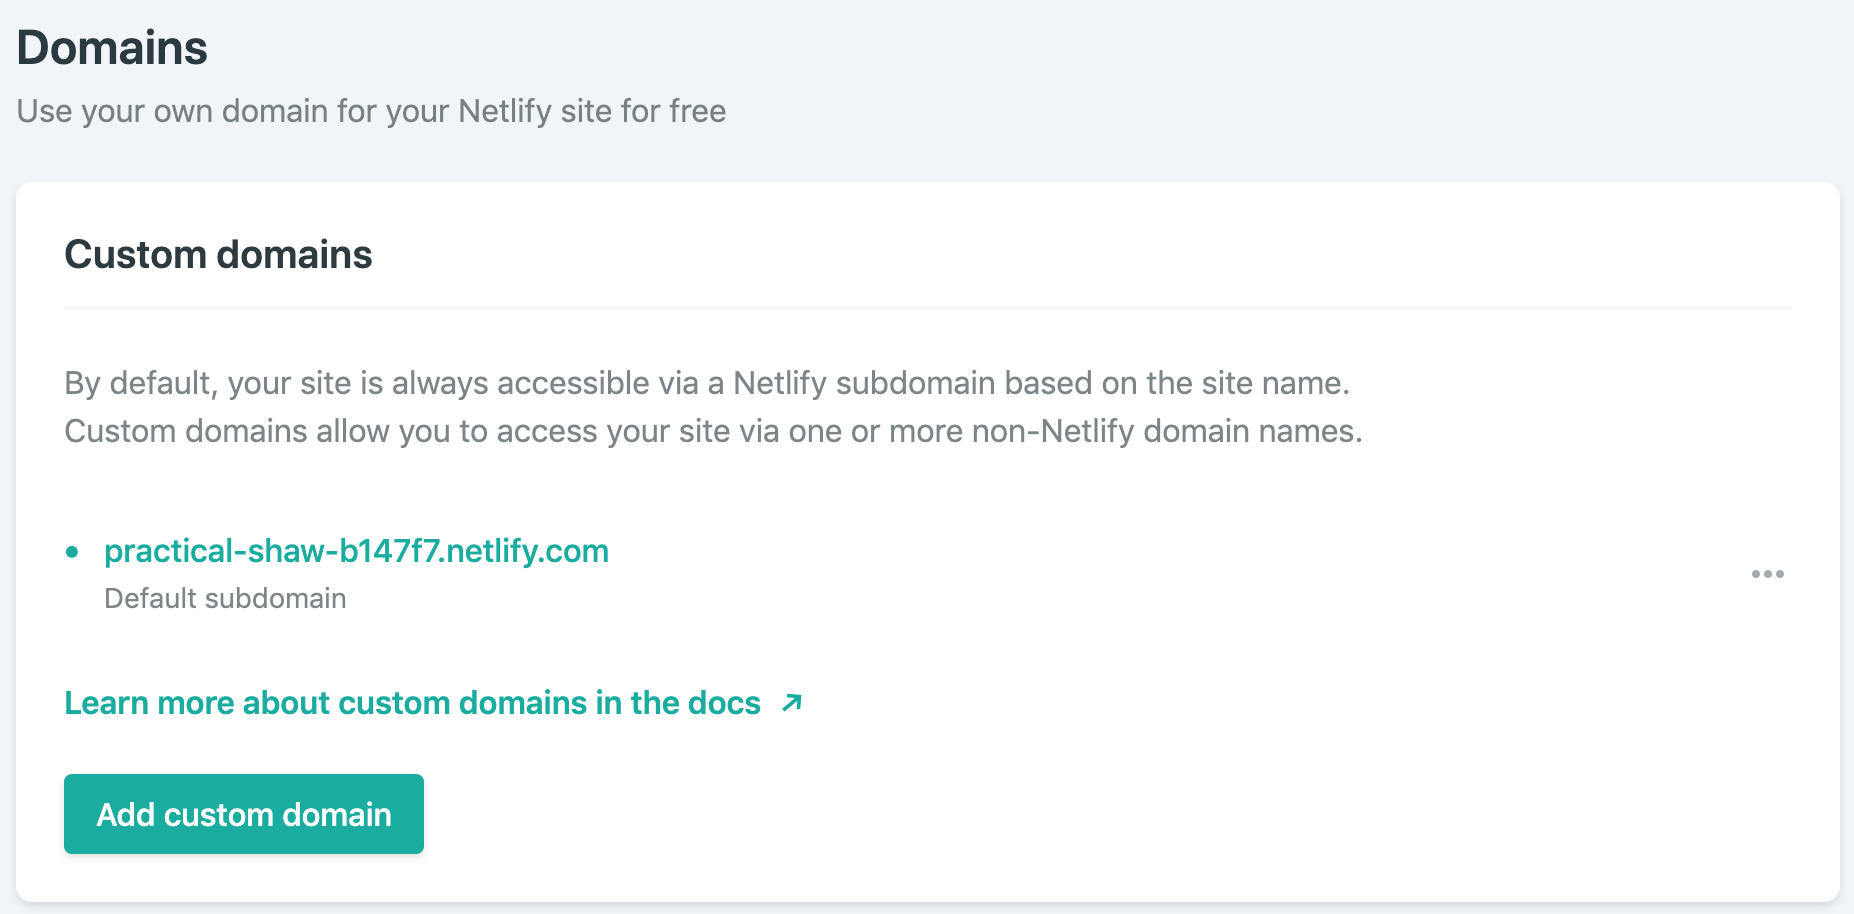
Add your domain name <github-username>.github.io and click ‘Verify’ and then click ‘Yes, add domain’ if prompted with new message.
Note your Netlify app’s name. In my case, it is ‘practical-shaw-b147f7’.
If you don’t want to create Netlify app and instead wish to use your own OAuth server, you can use ‘netlify-cms-oauth-provider’ package. The detailed instructions are given in its Github page. You need to replace ‘https://api.netlify.com/auth/done’ in the Github OAuth app settings with your own server callback url in this case.
-–
Now let’s go back to our project. We need to create a new folder inside our blog called ‘admin’. Inside it, create two files namely ‘index.html’ and ‘config.yml’. This ‘config.yml’ file is different from ‘_config.yml’ file that is in the root folder. The content for each file is provided below.
In the config.yml file, replace ‘repo’ with your Github repo and ‘site_domain’ with your Netlify app’s domain <your-netlify-app-name>.netlify.com (skip this in case of custom OAuth).
If you want to know more about what each attribute in the config.yml file does you can check it out here.
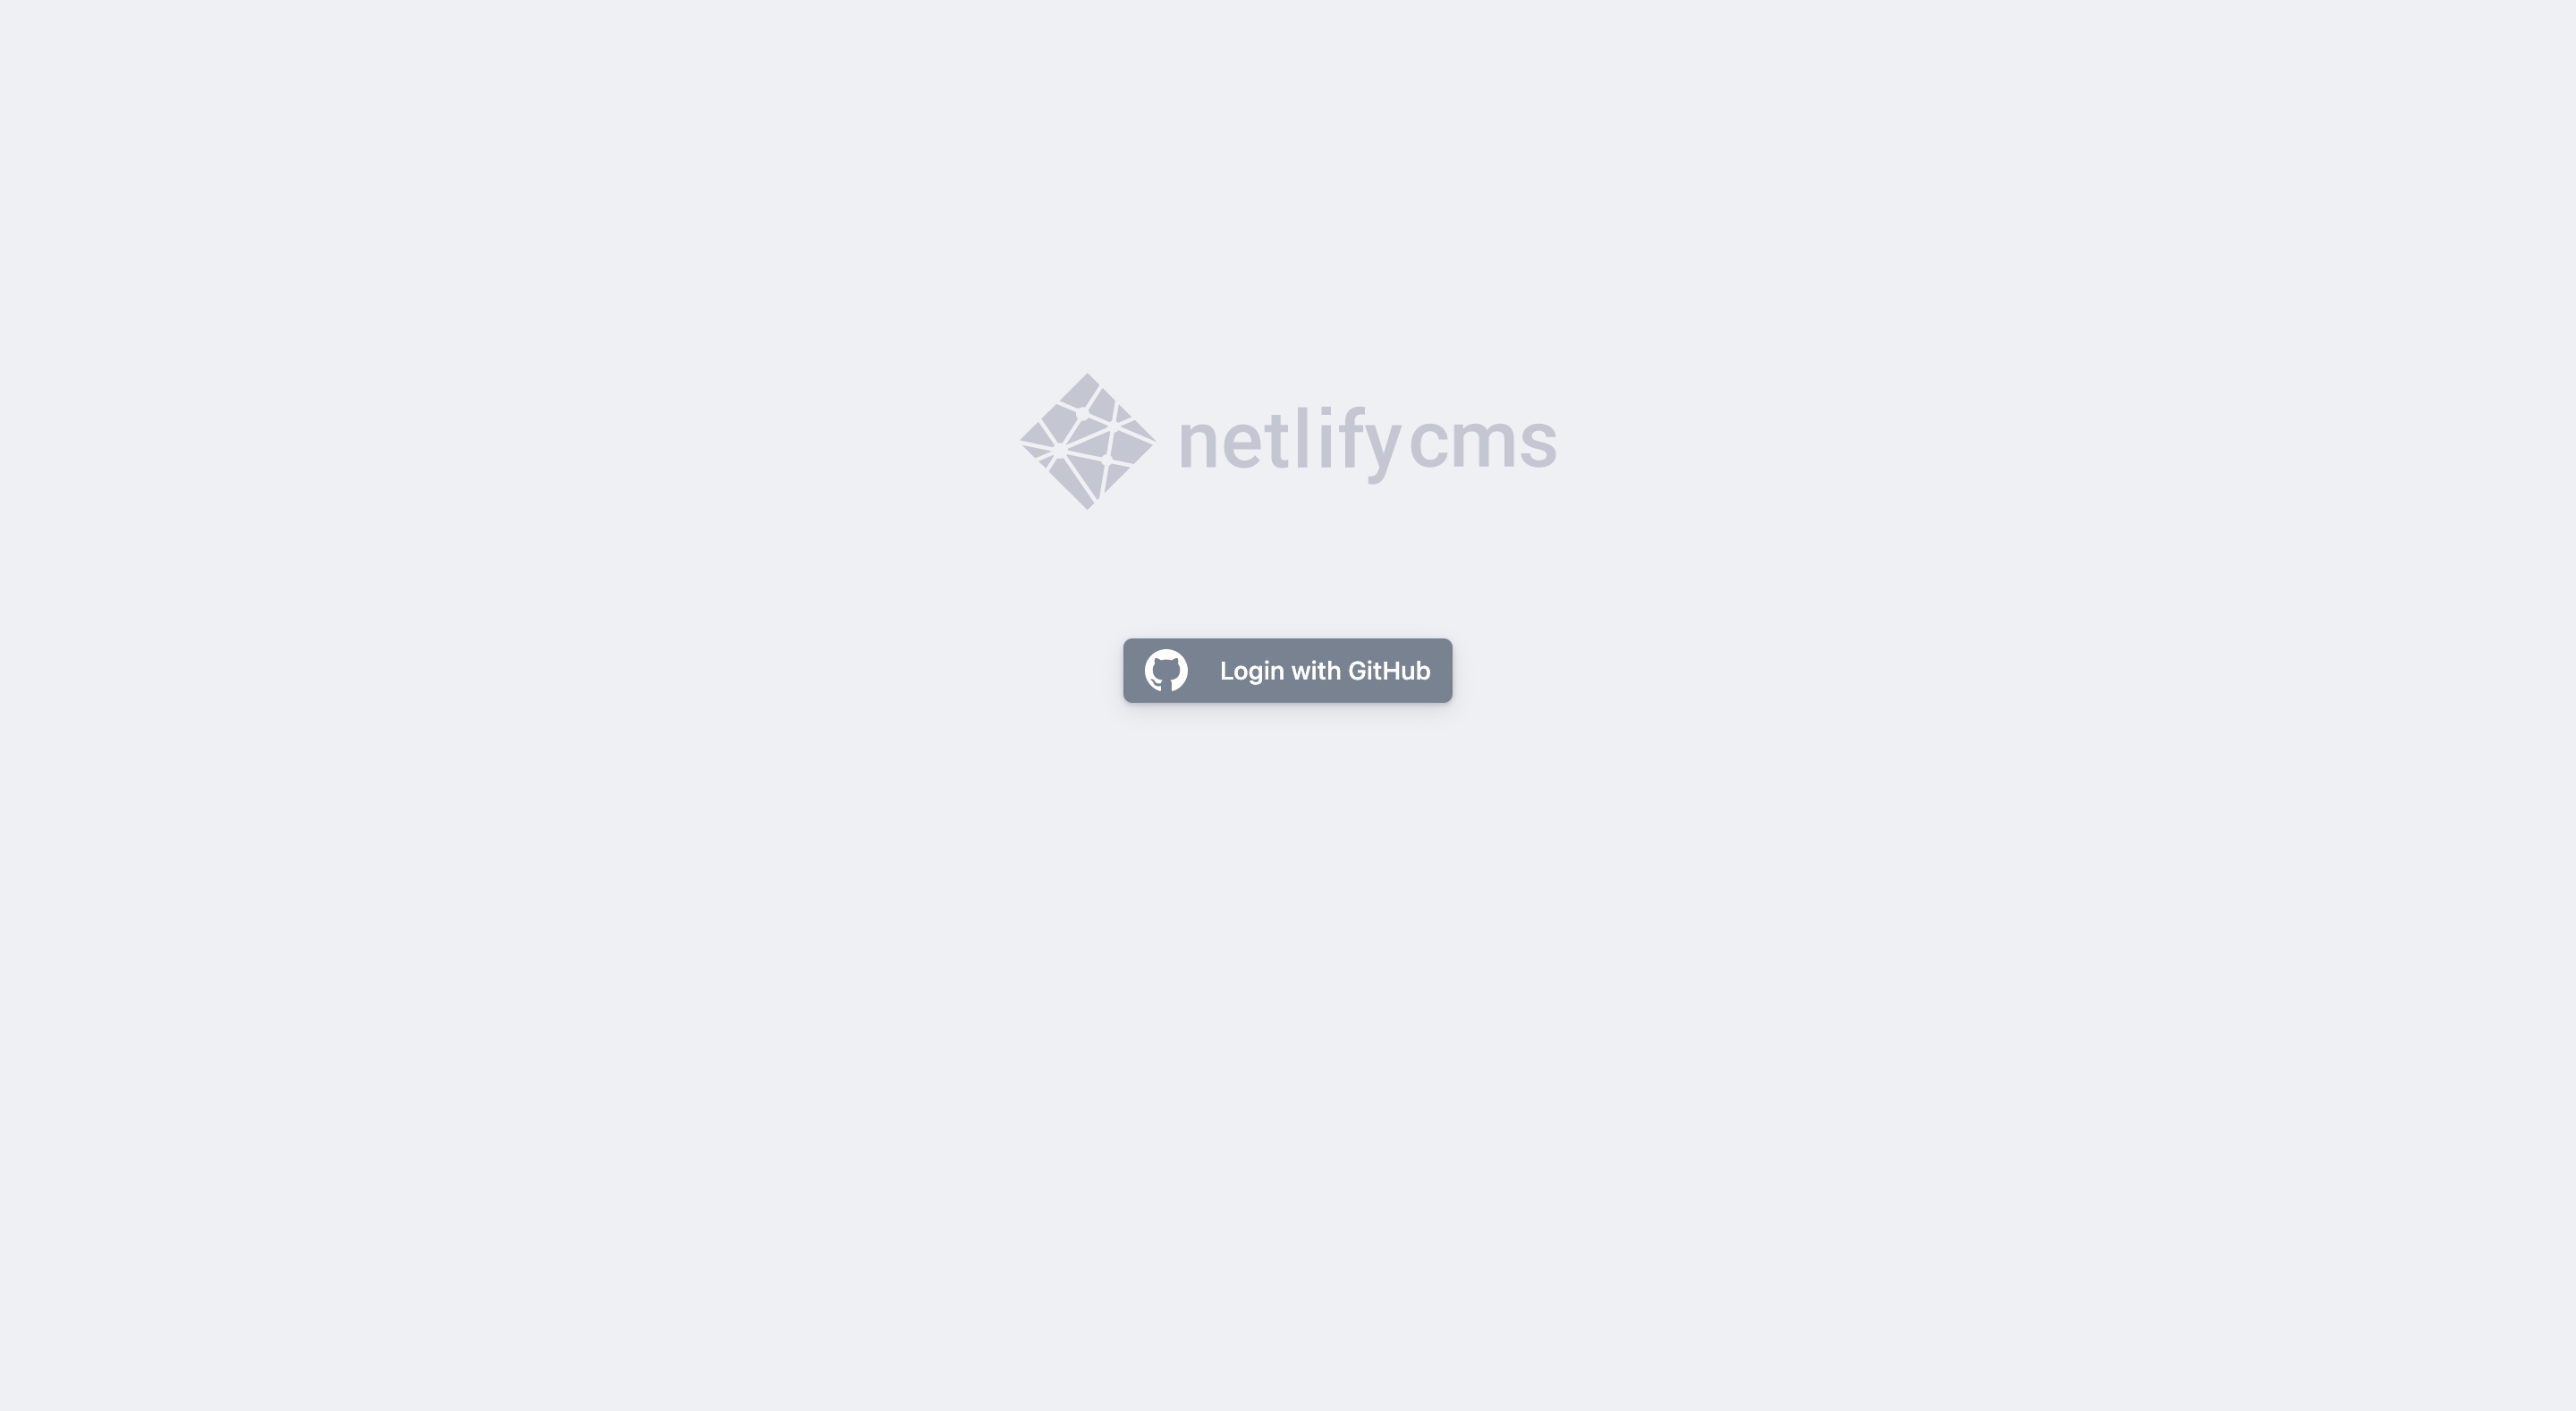
Save the changes and then push them to Github. We are done now. If you head over to https://<github-username>.github.io/admin, you should see Netlify CMS’s login page like this.
Note: It might take couple of minutes for Github pages to update.
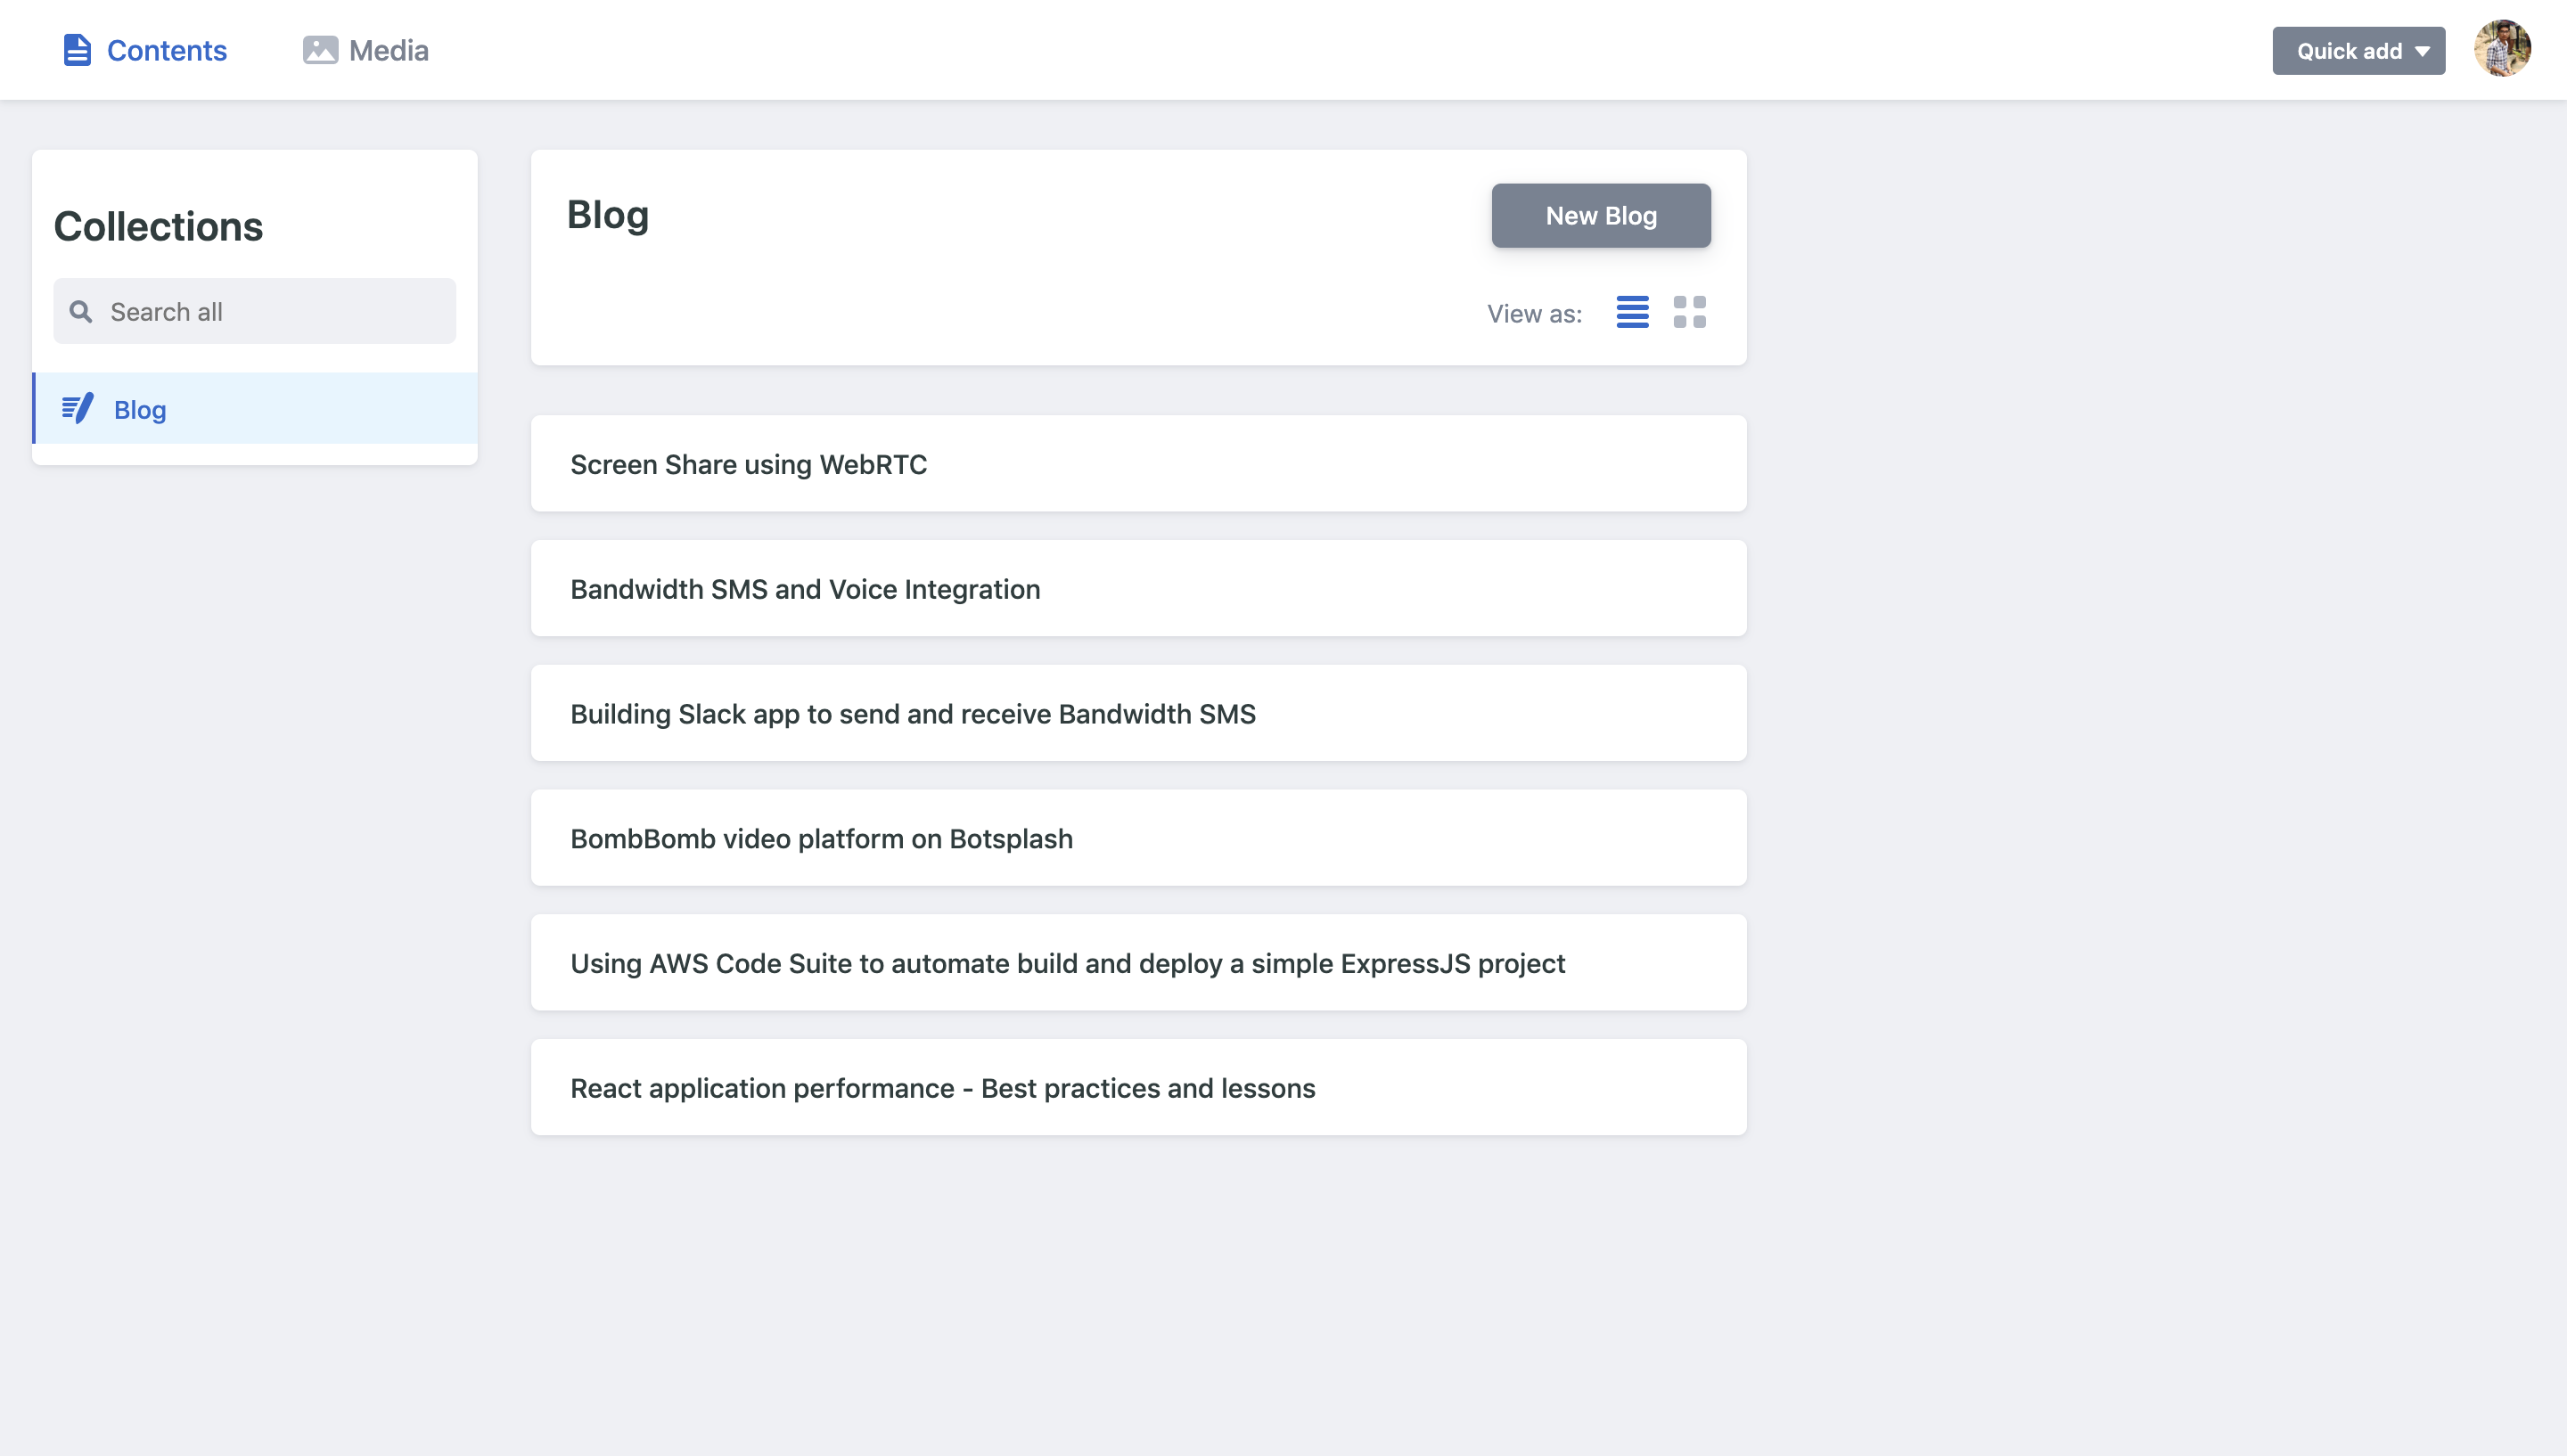
Go ahead and login with your Github account and you will be redirected to the CMS’s dashboard which contains all your posts. You can manage your blog posts from here.
Using Custom domain name (Optional)
If you wish to use custom domain, you can either
- Host the site in Netlify (which I mentioned briefly above under ‘Creating Netlify app’) and set your custom domain as primary domain in Netlify dashboard’s Domain management. Then simply log in to the account you have with your DNS provider, and add a CNAME record pointing to
<netlify-app-name>.netlify.com. - Continue hosting the site in Github pages and add CNAME record pointing to
<github-username>.github.iowith your DNS provider.
Obviously, these are just in regards to this tutorial. You have the flexibility to customize the project as much as you want and host them wherever you prefer to.
Thanks for following through. I hope you liked the article. If you want to read more of Botsplash team contributions, check out articles here.
Want to learn more about Botsplash platform? Write to us here.