
Original article posted at <https://botsplash.com/blog/screen-share-using- webrtc-ef416f6c0a65.html>
Screen Share using WebRTC
Excited today to write my first medium article and share the implementation for one of the latest platform feature – ”Screen Share”. This article will explore building first proof-of-concept screen-share application using ExpressJS , socket.io and simple- peer.
1. Setting up the project
Create new folder named “webrtc” and initialize it using yarn.
cd webrtc
yarn run init
You will be presented with interactive command line session, which you may choose to fill up all your information or leave them blank.
Create the following files inside the “webrtc” directory in the hierarchy shown below. We’ll discuss what each file does in a while.
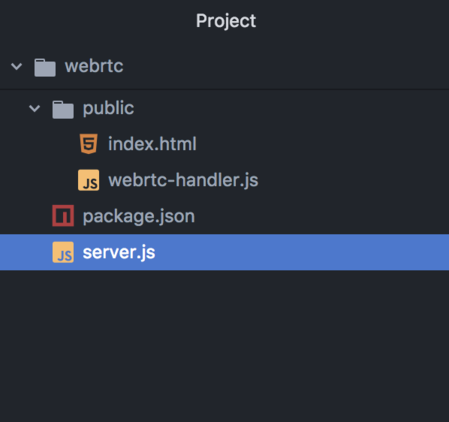
Server.js
This file will contain our server code that will handle socket data exchanges and also serve our static index.html file
public/index.html
This file will contain HTML and CSS. This will serve as UI to the users.
public/webrtc-handler.js
This file will act as websocket client and is responsible for exchanging peer network data.
You can add css files here in the public directory as well if you wish to make your interface better. We’ll keep it simple for now.
2. Installing ExpressJS server
We’ll be using ExpressJS server in this tutorial. So go ahead and install ExpressJS using the following command.
yarn add express
Let’s code a server now. Add following code to server.js file:
var express = require('express');
var app = express();
var http = require('http').Server(app);


app.use(express.static('public'));


http.listen(3000, () => console.log('Example app listening on port 3000!'))
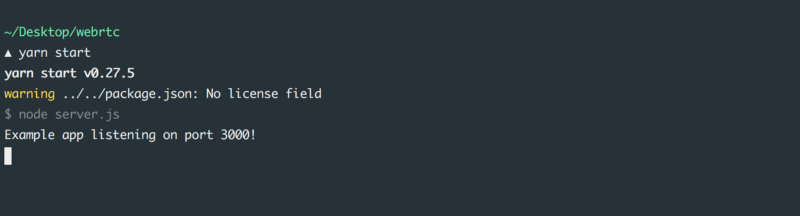
This is a straightforward ExpressJS code. This will run our server in port
- Go on and run “yarn start” in your terminal and visit
http://localhost:3000 in your browser. You should see this in your terminal.
Add socket.io
We’ll need a medium in order to control coordination and message between Peers. This is also known as “Signalling”.
WebRTC uses RTCPeerConnection to communicate streaming data between browsers (aka peers), but also needs a mechanism to coordinate communication and to send control messages, a process known as signaling.
Let’s add socket.io to your express application so that it can start listening to messages from socket clients.
yarn add socket.io
This will add socket.io to our package.json and the project.
// server.js


var io = require('socket.io')(http);


io.on('connection', () => {
  console.log('user connected');
});
We’ll need to test this out. We’ll do that by creating a socket client in our public/index.html file.
<!DOCTYPE html>
<html lang="en" dir="ltr">
  <head>
    <meta charset="utf-8">
    <title>Screensharing using Webrtc</title>
    <script src="<https://cdnjs.cloudflare.com/ajax/libs/socket.io/2.1.1/socket.io.js>"></script>
  </head>
  <body>
    <script src="<https://cdnjs.cloudflare.com/ajax/libs/simple-peer/9.1.2/simplepeer.min.js>"></script>
    <script src="./webrtc-handler.js"></script>
  </body>
</html>
What we’ve done is included “socket.io.js” to our index.html file. This will enable us to talk to socket servers. We’ve also added “simple-peer” CDN along with our webrtc-handler.js file. Now we have SimplePeer and io variables available in webrtc-handler.js file.
Let’s open our webrtc-handler.js and test our connectivity with the socket server.
// public/webrtc-handler.js


var socket = io.connect();
Refresh the page and you should now see “user connected” message added to your console.
We’ll now start to get user’s screen stream using getUserMedia function inbuilt in the browser. You can read more about getUserMedia here.
// public/webrtc-handler.js


navigator.mediaDevices.getUserMedia({
  video: {
    mediaSource: "screen",
    width: { max: '1920' },
    height: { max: '1080' },
    frameRate: { max: '10' }
  }
}).then(gotMedia);
The function gotMedia will receive the stream received from the browser.
function gotMedia (stream) {
  // got the stream
}
Let’s make sure we receive the stream by displaying this stream in a video tag. Open index.html and add video tag.
<video autoplay></video><br />
<button id="initiateBtn">Start Sharing</button>
<button id="stopBtn" style="display:none">Stop Sharing</button>
I’ve also gone ahead and added two buttons to share and stop the screenshare which we’ll be requiring later.
Let’s update the gotMedia function to play the video stream onto the video tag.
function gotMedia (stream) {
  var video = document.querySelector('video');
  video.srcObject = stream;
  video.play();
}
In order to send this stream, we’ll be using WebRTCPeerConnection. We have a package called SimplePeer which will make it easy for us to implement this. This is how it will work.
When “Client1” clicks initiate button, we will send message to the socket server to inform that we want to share our video stream.
// public/webrtc-handler.js


var initiateBtn = document.getElementById('initiateBtn');
var initiator = false;


initiateBtn.onclick = (e) => {
  initiator = true;
  socket.emit('initiate');
}
Socket server then emits message to both “Client1” and “Client2” regarding this request.
// server.js


...


socket.on('initiate', () => {
  io.emit('initiate');
});


...
Both the clients will listen to this message and on receiving, “Client1” will start fetching their screenshare stream using getUserMedia function as discussed above. Both the clients will create new SimplePeer object with the stun server configurations. “Client1” will attach their stream to this SimplePeer object.
// public/webrtc-handler.js


const stunServerConfig = {
  iceServers: [{
    url: "....",
    username: "...",
    credential: "..."
  }]
};


function gotMedia (stream) {
  if (initiator) {
    var peer = new Peer({
      initiator,
      stream,
      config: stunServerConfig
    });
  } else {
    var peer = new Peer({
      config: stunServerConfig
    });
  }


  ...


}
Now the peer should start receiving signals when they get connected to the STUN servers. At this point, we’ll use socket.io to exchange this signal data.
// public/webrtc-handler.js


function gotMedia (stream) {


  ...


  peer.on('signal', function (data) {
    socket.emit('offer', JSON.stringify(data));
  });


  ...


}
This is sending the client signal information to the socket server. The socket server will receive this and send it to the other client thus completing the exchange.
// server.js


socket.on('offer', (data) => {
  socket.broadcast.emit('offer', data);
});


// public/webrtc-handler.js


socket.on('offer', (data) => {
  peer.signal(JSON.parse(data))
})
Now the peers are connected to each other and are ready to listen to the stream sent by “Client1”.
Let’s listen to this stream and play this stream received in our video tag just like we did before.
peer.on('stream', function (stream) {
  // got remote video stream, now let's show it in a video tag
  var video = document.querySelector('video');
  video.srcObject = stream;
  video.play();
})
There you go, the screenshare stream from “Client1” should start playing in “Client2”. You can test this by visiting http://localhost:3000 from different browsers or in incognito mode.
The complete source code is mentioned below.
Server.js
index.html
webrtc-handler.js
Conclusion
So, here you have a basic project which allows us to share our screen using WebRTC. This is example works in Mozilla Firefox but requires an Extension to work with Chrome browser (to be followed in next article).
Do share your thoughts in the comments.
To read more of botsplash team contributions, check out articles here.
For more articles on Live Chat, Automated Bots, SMS Messaging and Conversational Voice solutions, explore our blog.
Want to learn more about botsplash platform? Write to us here.